Step and Keypad boards
The P3 step and keypad boards have been made to accept four different types of switch, as shown in the photo below.
From left to right, these are Cherry MX switches, Maplin keyswitches, Multimec 3FTL6 tact switches, and standard 12mm tact switches.

The function key board only accepts Multimec or standard 12mm tact switches.

Note that the production P3 case will suit only the Cherry MX keys or Maplin keys for the step and keypad boards, and Multimec tacts for the function board.
Also, if you use the Maplin keys you will require spacers to increase the mounting depth of the PCBs.
The Cherry MX keys are the production parts. A set is available as an option when you buy the kit, which includes laser engraved caps and switch bodies:

Part numbers for the Maplin and Multimec switches can be found in the BoM.
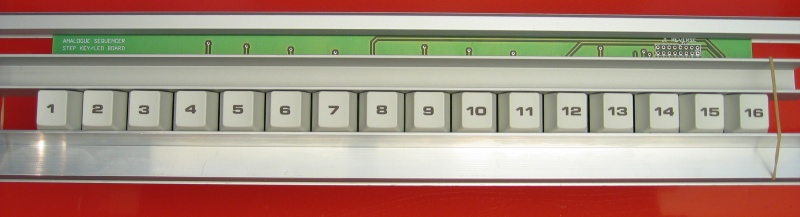
When fitting the keys, it can be tricky to get them all neatly lined up:

To ensure alignment, I use a jig made from two pieces of aluminium angle and some elastic bands:
It's a good idea only to solder one pin of each switch, then check the alignment, before soldering all the other pins.
Note also that the 16 pin IDC connectors on all the key boards are fitted to the REVERSE side of the board:

Pin 1 of the connectors is indicated by a square pad, and you can only align the connector correctly if it is fitted to the opposite side of the board from the component silk-screen.
The tri-colour LEDs on the step key board should not be soldered in place until you have fitted the board to your front panel. Even if you are using LED spacers to set the correct height, you should still only solder the centre leg then ensure the LEDs align in the panel holes before soldering all the legs.
Remember to observe the correct polarity for the LEDs - the RED anode (right-angled, longer outside lead) goes to the TOP of the three holes.

On the keypad board, it is essential to fit the matrix diodes before you fit the keys, otherwise it can be almost impossible to get them in. It's standard practice to fit components in increasing order of size, so this shouldn't really present a problem.

back